Ever since I was a little kid, I knew that coffee was brewed with boiling water. But after 45 years of drinking boiled coffee, I read a book – “Homeland” – by Cory Doctorow that grabbed my taste buds and wouldn’t let go! He introduced me to COLD BREWED COFFEE. Here’s an edited excerpt:
" If you make coffee in cold water, you only extract the sweetest acids, the highly volatile flavors that hint at chocolate and caramel…and it produces the best-tasting, most potent coffee you've ever drunk."
The full excerpt can be found following this article, along with licensing info.
I was sold! The description was so irresistibly enticing that I just had to try it! I experimented with cold brew for the last two years and finally found a method that works for me, and I’d like to share it with you.
Many times, cold brewed coffee is brewed to create a concentrate. I make mine to be drinkable and delicious as is as soon as it’s done brewing.
Much of the time, cold brew fans drink it cold. Now me – when I take my life-giving caffeinated beverage in the morning, I gotta have it HOT! Drinking something hot helps me wake up better than something cold.
WHAT KIND OF BEANS SHOULD I GET? Ever since I had the chance to visit Hawaii in 2012, the only beans that I buy are from Maui Grown Coffee. They’re around $20 a pound, but they’re so good that they’re worth every penny! If you can fit Maui Grown beans into your budget, try some. You will be happy you did. However, not everyone wants to spend that much, so I bought some generic dark roast beans at my local grocery store in San Antonio, Texas. I brewed a pot with them, let it brew for 48 hours, and my oh my, was that coffee good! I could hardly believe what a great cup of coffee came from these beans of common stature! So bottom line, pretty much any beans that you can buy at your local grocery store will do a fantastic job.
STEP 1 Grind one cup of beans at the coarsest grind possible. Since a proper grind and using the proper grinder is so important to cold brew coffee, here’s video #1 – Grinding:
I use a Capresso 560.01 Infinity Conical Burr grinder. It’s very important to make a good cold brew that the beans are ground very coarse, and that the size of the grounds be as uniform as possible. The little 2-blade grinders don’t do that. For a detailed explanation of burr-type grinders, go to https://www.beanground.com/conical-vs-flat-burr-grinder/.
Drop the grounds at the bottom of a French Press. I use a Bodem Chambord 1.5 liter (51 Ounce) model. I specify a French Press because it just makes the entire process so easy. Some articles (see links below) suggest brewing the coffee in a container and straining the grounds through cheese cloth and then through a paper filter. This sounds hard to me. By using a French Press, the coffee is brewed and decanted from the same container, using the press to do the major filtering. The following steps use a French press.
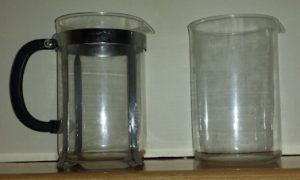
HINT – since each batch of cold brew takes 12 to 24 hours to be ready, get an extra beaker or 2 so that you can you can have more ready-to-drink coffee available. I always like to have some ready-to-drink coffee stored in the refrigerator and some brewing.
Here’s video #2 – The Best Water That You Can Use to Make Coffee, Stirring
STEP 2 Add water and stir. Through trial and error, I found that 42 ounces of filtered tap water is the perfect amount for my taste. Less than 42 ounces of water makes the coffee too strong for my taste, more than 42 makes my coffee too weak. You will have to experiment to find your own perfect water amount.
Why filtered tap water? Why not distilled water? I used to use distilled water, thinking that I didn’t want any trace of chlorine or other chemicals in my coffee. In researching this article, I learned that distilled water is the last thing that you want to use when brewing coffee. (See links below) Turns out that for the water to extract the flavor from the coffee beans, it needs to have minerals in it! Huh. Naturally, I had to experiment, and the verdict is in — distilled water does make bland coffee. What I thought was great is now Rockin’!
QUESTION – What do I do if my house has a water softener / reverse osmosis unit? Or what if my water is just plain nasty and I have to use bottled water for cooking and drinking?
ANSWER – You need to read this article: https://prima-coffee.com/learn/article/manual-brewing/intro-water. In this article, the author Steve Rhinehart reviews 2 companies that make mineral supplements that will give the necessary minerals to soft or distilled water to make perfect coffee (links are below).
When you stir, use a wooden or plastic spoon instead of a metal one. 2 reasons – (1) a metal spoon can easily crack a glass brewing container, and (2) a metal spoon may give the coffee a metallic taste.
STEP 3 Cover your brewing container and let your coffee brew. I brew mine for 48+ hours. You’re going to have to find your own sweet spot. Don’t be afraid to try longer brewing times. I suggest that you start out at 12 hours, see how your coffee tastes, and increase in 4 to 8 hour intervals. If you want to try brewing for over 24 hours, put it into the refrigerator. I really encourage you to try 48+ hours. The flavor and difference from shorter brew times is simply indescribable! Remember, the entire object of this exercise is to make the most flavorful coffee that you possible can, so brew fearlessly! Dare to be bold!

STEP 4 Decant the finished brew. To get the least sediment in my cup, I use the following procedure:
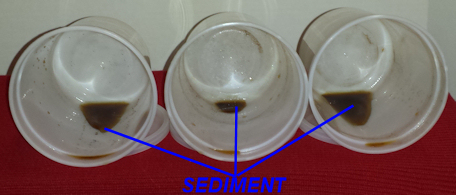
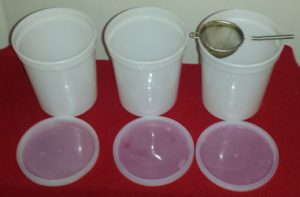 Use 3 1-quart plastic containers (I got mine from take-out soup) and decant a portion of the pot into each one – most in the first, less in the second, and the least in the third. Pour through a fine wire-mesh strainer to keep out any grounds.
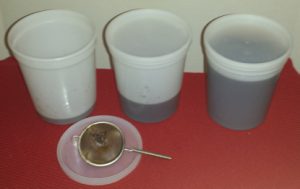 The first 2 containers will have the least sediment and the third, coming from the bottom of the beaker, will have the most.
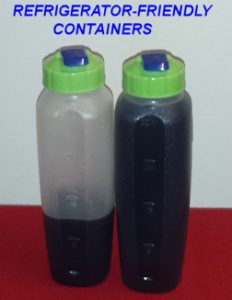 After the decanted coffee has settled for at least an hour, you can pour the coffee into a refrigerator-friendly container with a tight-fitting lid.
As you pour the coffee, slow down towards the end, and look for the sediment to start coming out. At that point, stop pouring and dump out the sediment into the sink.
Your cold brewed coffee can be stored for up to a week in the refrigerator.
THE REWARD FOR ALL OF YOUR WORK AND PATIENCE
Time to drink your cold brewed coffee! If you like your coffee cold, then you’re all set! If, however, you enjoy your coffee hot, then here’s what I do:
For a visually pleasing coffee experience, be sure to add your sweetener before you heat it. Splenda, Sweet’N Low, etc. stir in easy when the coffee is still cold, sugar takes a bit more work, just like with iced tea. If you add artificial sweetener to you coffee after you’ve heated it, the sweetener will cause a foamy bloom to appear on top of your coffee.
I use a heavy 12-ounce mug. For that cold brew freshly removed from the refrigerator I recommend two minutes, twenty seconds in the microwave. That gives me “baby bear” temperature — j-u-s-t right. If the coffee is room temperature, I only nuke it for 90 seconds. Your mileage may vary.
NOW ENJOY!
OOPS – Don’t run away too soon…
Cleaning Your French Press
After making awesome coffee for a few months, your French press will start to lose its shine and luster. All of the wonderful things that make cold brew coffee taste so marvelous will also turn your nice clean French press coffee-colored itself. BUT – happily the answer is quick and easy!
! The video really shows it best, but here’s some detail that the video couldn’t show.
Here’s the press, ready for disassembly and cleaning:
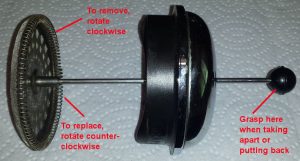
Once disassembled, the parts are laid out like this:
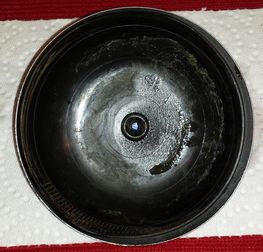 This is the inside of the lid. Note the dried coffee deposits. Soak in warm soapy water to loosen, and clean with paper towel or nylon scrubbing pad – do NOT use abrasive pad.
Filter Components
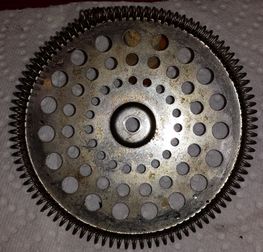 Top plate
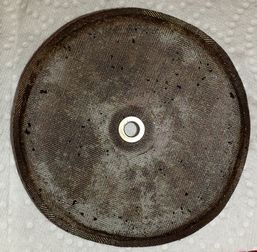 Mesh filter
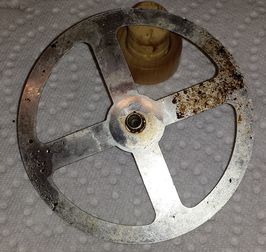 Bottom plate
I cleaned these about 2 weeks ago. You can see that the filter components are already getting clogged up and discolored. Put the components into a bowl of warm soapy water and let them soak for a while, especially the mesh filter. Then just rinse them, maybe a light wipe with a paper towel, and you’re good to go. The mesh filter is fragile, so treat it gently.
That’s it! As the saying goes, “Take care of your equipment, and it will take care of you”.
LINKS AND STUFF
THE NATURE OF COFFEE BEANS
Should Coffee Beans be Oily for the Best Taste?
RECIPES
https://wellnessmama.com/60906/cold-brew-coffee/
https://wellnessmama.com/60906/cold-brew-coffee/#comments
https://cooking.nytimes.com/recipes/1017355-cold-brewed-iced-coffee
https://www.simplyrecipes.com/recipes/how_to_make_cold_brew_coffee
https://www.jamieoliver.com/news-and-features/features/how-to-make-cold-brew-coffee/
https://food52.com/blog/7317-how-to-make-cold-brewed-coffee
https://www.bonappetit.com/test-kitchen/cooking-tips/article/ba-s-diy-cold-brew-coffee-recipe
http://www.mydomaine.com/cold-brew-coffee-ratio
http://www.mydomaine.com/how-to-make-cold-brew-coffee
WATER
http://www.fortunescoffee.com/blog/perfecting-the-cold-brew/
http://www.huladaddy.com/articles/check-your-water-before-you-brew-your-coffee.htm
https://prima-coffee.com/learn/article/manual-brewing/intro-water
https://www.freshcup.com/water-and-cold-brew/
http://www.bunn.com/dr-brew-blog/oily-film-coffee
IF YOUR WATER IS TOO SOFT OR YOU NEED TO USE DISTILLED WATER
https://www.globalcustomizedwater.com/store
GRINDERS
https://driftaway.coffee/conical-vs-burr-grinder/
https://driftaway.coffee/grinders/
https://driftaway.coffee/coffeecademy/
https://www.beanground.com/conical-vs-flat-burr-grinder/
DEALING WITH STATIC
https://www.cooksillustrated.com/how_tos/8357-minimizing-static-in-burr-grinders
Wine Racking (to remove sediment)
https://www.winefrog.com/definition/164/wine-racking
CORY DOCTOROW AND HIS BOOKS
From Cory Doctorow’s book Homeland, a sequel to Little Brother.
You’ve had hot coffee before, and in the hands of a skilled maker, coffee can be amazing. But the fact is that coffee is one of the hardest things to get right in the world. Even with great beans and a great roast and great equipment, a little too much heat, the wrong grind, or letting things go on too long will produce a cup of bitterness…But there is Another Way. If you make coffee in cold water, you only extract the sweetest acids, the highly volatile flavors that hint at chocolate and caramel, the ones that boil away or turn to sourness under imperfect circumstances. Brewing coffee in cold water sounds weird, but in fact, it’s just about the easiest way to make a cup (or a jar) of coffee… cold-brew coffee tastes amazing, and it’s practically impossible to screw it up… Just grind coffee — keep it coarse, with grains about the size of sea salt… Seriously, you could grind it with a stone axe. Unlike drip coffee, which goes sour and bitter if you leave the grounds in contact with the water for too long, cold-brew just gets yummier and yummier (and more and more caffeinated!) the longer the grounds sit in the water. Cold-brewing in a jar is pretty much the easiest way to make coffee in the known universe — if you don’t mind waiting overnight for the brew — and it produces the best-tasting, most potent coffee you’ve ever drunk.
You’ve had hot coffee before, and in the hands of a skilled maker, coffee can be amazing. But the fact is that coffee is one of the hardest things to get right in the world. Even with great beans and a great roast and great equipment, a little too much heat, the wrong grind, or letting things go on too long will produce a cup of bitterness. Coffee’s full of different acids, and depending on the grind, temperature, roast, and method, you can “overextract” the acids from the beans, or overheat them and oxidize them, producing that awful taste you get at donut shops and Starbucks.
But there is Another Way. If you make coffee in cold water, you only extract the sweetest acids, the highly volatile flavors that hint at chocolate and caramel, the ones that boil away or turn to sourness under imperfect circumstances. Brewing coffee in cold water sounds weird, but in fact, it’s just about the easiest way to make a cup (or a jar) of coffee. Just grind coffee — keep it coarse, with grains about the size of sea salt — and combine it with twice as much water in an airtight jar. Give it a hard shake and stick it somewhere cool overnight (I used a cooler bag loaded with ice from ice camp and wrapped the whole thing in bubble wrap for insulation). In the morning, strain it through a colander and a paper coffee filter. What you’ve got now is coffee concentrate, which you can dilute with cold water to taste — I go about half and half. If you’re feeling fancy, serve it over ice.
Here’s the thing: cold-brew coffee tastes amazing, and it’s practically impossible to screw it up. Unlike espresso, where all the grounds have to be about the same size so that the high pressure water doesn’t cause fracture lines in the “puck” of coffee that leave some of the coffee unextracted and the rest overextracted, cold-brew grounds can be just about any size. Seriously, you could grind it with a stone axe. Unlike drip coffee, which goes sour and bitter if you leave the grounds in contact with the water for too long, cold-brew just gets yummier and yummier (and more and more caffeinated!) the longer the grounds sit in the water. Cold-brewing in a jar is pretty much the easiest way to make coffee in the known universe — if you don’t mind waiting overnight for the brew — and it produces the best-tasting, most potent coffee you’ve ever drunk. The only downside is that it’s kind of a pain in the ass to clean up, but if you want to spend some more money, you can invest in various gadgets to make it easier to filter the grounds, from cheap little Toddy machines all the way up to hand-blown glass “Kyoto drippers” that look like something from a mad scientist’s lab. But all you need to make a perfectly astounding cup of cold-brewed jet fuel is a mason jar, coffee, water, and something to strain it through. They’ve been making iced coffee this way in New Orleans for centuries, but for some unknown reason, it never seems to have caught on big-time.
Wait a minute — is it ok for me to reprint this much material?
Yes it is. Here’s the copyright info:
This book is distributed under a Creative Commons Attribution-NonCommercial-NoDerivs 3.0 license. That means:
You are free:
- to Share — to copy, distribute and transmit the work Under the following conditions:
- Attribution. You must attribute the work in the manner specified by the author or licensor (but not in any way that suggests that they endorse you or your use of the work).
- Noncommercial. You may not use this work for commercial purposes.
- No Derivative Works — You may not alter, transform, or build upon this work.
For any reuse or distribution, you must make clear to others the license terms of this work.
The best way to do this is with a link ‹http://craphound.com/homeland›.
Please check out these awesome books by Cory Doctorow. You can download them free, or you can buy them – it’s completely up to you.
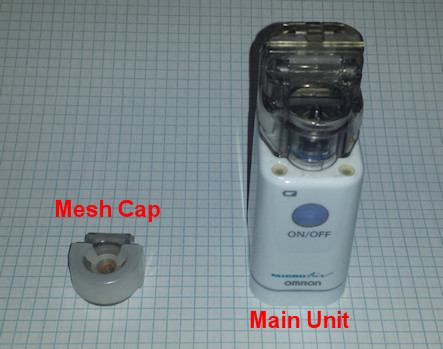
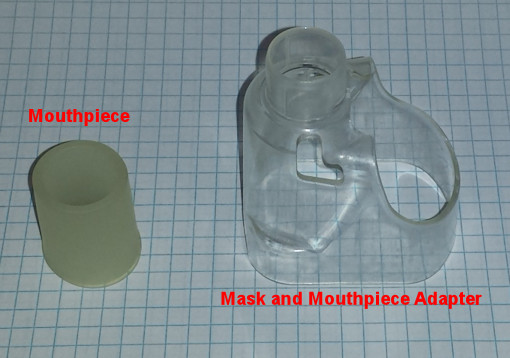
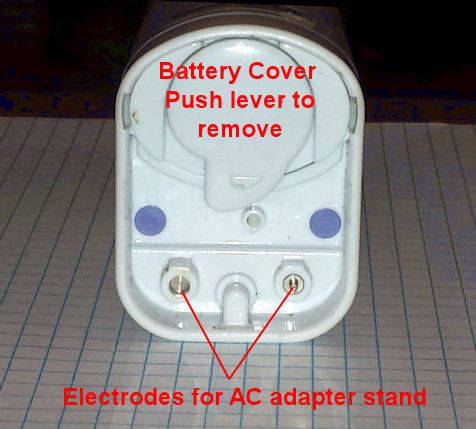
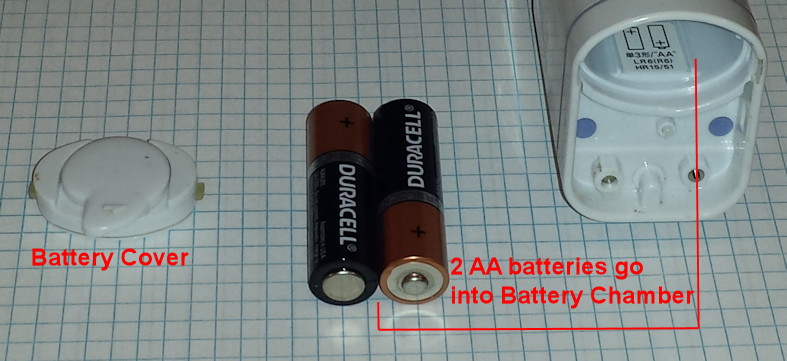
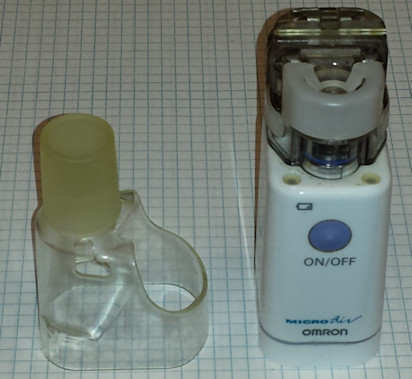
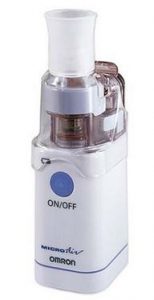 This is the Omron Micro-Air Electronic Nebulizer System NE-U22V1. Like I said above, we’ve been using it for over 15 years. The only part that I’ve ever had to replace is the 2 AA batteries, which for our purposes generally last at least a year.